Wednesday, November 18, 2015

Sideboard Before And After

I had wanted a sideboard for our dining room for a long time.
The one that matched our dining table 
was almost $600...
we couldn't afford that since Shaun is going to school 
for his Masters degree.
So I set out to find a cheaper one.
The cheapest I could find was at TJ Maxx,
it was $399.
So I set out again to find a used sideboard.

I found this sideboard at a local store,
Called Savvy Furniture & Consignment!
It had been there for a few months, so it was on sale
for $137!

I bought it, but I was unable to pick it up right away
(I had surgery the week before).
The couple that owns Savvy was so sweet,
they offered to deliver the sideboard to our house!
If you ever need a good deal on a unique furniture/decor
piece, you should definitely check out Savvy.
They have new items everyday!
(I have also sold a few items thru their store)


 Since the piece was built in the 1940's,
it had some wear and tear.
So, I power sanded the stain and sealant off
(Always wear a mask when doing this).

I bought a deep kona shade of stain at Hobby Lobby
and only applied one coat, in order to match our dining table.
I also bought some new hardware at Home Depot.

After the stain was dry I applied the polyurethane top coat 3 times.

I put the new hardware on and voila! 


I hung the mirror in the wrong spot, and had to patch the holes..I still need to paint them 

I really like how it all turned out!
And I also love that I can take pride in the fact that I made it pretty again!

BEFORE & AFTER

BEFORE

AFTER


 Thanks to whoever decided they didn't want this awesome 1940, solid wood,
sideboard anymore.
And double thanks to Savvy for delivering it while I healed from surgery!


Monday, September 21, 2015

Bathroom BEFORE and AFTER

The bathroom is finally complete!
We got delayed several weeks because the company
that we ordered the toilet from sent us a
defective one,
and than they accidentally sent us a SINK to replace it with,
instead of a new toilet...
so we just barely got the new toilet tank this morning...
(NEVER ORDER FROM NATIONAL BUILDER SUPPLY!!)

Since this is a 1917 home,
I wanted to renovate more than update this bathroom.
So I went with a classic black and white hexagon tile...
white bead board and 4 inch wood trim along the floor.

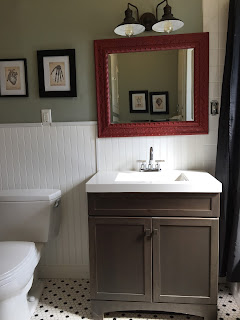
The vanity has very clean lines and a dark finish
to compliment the black color in the tile floor.

The light has a vintage-y look and I love how
it looks paired with the red mirror.

I painted the walls a grey/green color called 
ESCAPE GRAY
from Sherwin Williams.

And the human anatomy prints
are from an ETSY store called

They are a cute little couple from Pennsylvania
and they have very good prices,
excellent quality
and a HUGE selection!
ps-let them know I sent you when you order something!

Here are the Before and After pics!!


Before
After


Before
After


Before
After


Before
After


Before
After
Before

After


After


Vanity Light from Lowes
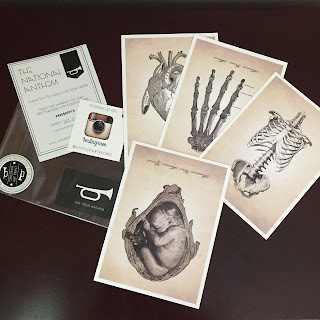
The National Anthem Prints: Foot Bones, Heart, Hand Bones


The National Anthem Prints: Baby in womb and Rib Cage

BEFORE


AFTER


Thursday, September 10, 2015

Bathroom Design

Just when I thought the bathroom renovation was over,
we wake up to a wet floor in the
bathroom....

Come to find out the toilet we ordered
from Toto
(A very nice toilet brand worth every extra penny)
had a defect.
It had a slight crack that was not completely sealed
and therefore it took about 10 days to start
leaking onto to the floor.

I called the company they had me send over pics of
the crack, to make sure it was their fault and 
not our contractors fault.

They immediately sent a new tank that
afternoon.
We should get it by Monday.

Anyway,
here is what is going into the bathroom
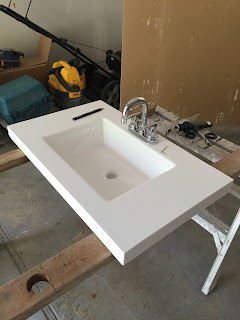
We originally bought the vanity on the left, but decided to exchange it for the one on the right

The mirror...Look at that baby checkin his Abs!

Im in love with this sink and pegasus faucet

The prints I ordered from National Anthem on ETSY

The crack that took 10 days to show itself

Fingers crossed the new toilet tank gets here on Monday...or sooner!


Wednesday, September 9, 2015

Kitchen Doorway Transformation

 Nobody cares about this part of the transformation of
the kitchen as much as I do...
But look at the before and after pictures at the very end of the post.
It's pretty crazy how much difference some new trim
made on the total look of the doorways!!!
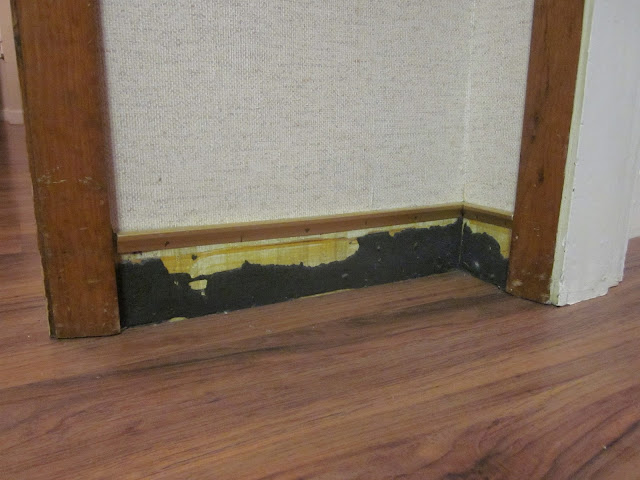
The Doorway (to dining room and hallway) Before we did anything
Old yellow plaid baseboard covered with old kitchen carpet glue


Ripping off the old trim
Old Trim GONE

Gold metal trim casing GONE

New Trim up on Left Doorway

New Trim up on both doorways, and new paint color started

BEFORE:


AFTER:


BEFORE:


AFTER:

A little bit of new trim can totally change the look of a doorway!!

Saturday, September 5, 2015

China Cabinet Transformation


Our kitchen had a very outdated china cabinet...complete with glass sliding doors
and scalloped edges.

There was only so much we could do to
it because it was attached to the other cabinets 
and the middle scalloped wood piece was 
providing support for the shelving.
The box-like structure
Sticking out in the middle of the shelving is the 
old fireplace chimney flue.
(Our house has 4 chimneys, because that's how they heated the home in early 1900's) 

SO, we decided to update it as much
as we could with those stipulations.  

Here is its transformation thus far!

Glass doors and a mess on the shelves


partially painted...with sneak peak of the partially finished cabinets!!

A little more paint

In process of adding trim to cover scalloped edges

Glass doors gone, plastic door tracks gone, scalloped edges covered and completely painted

BEFORE & AFTER


Monday, August 31, 2015

Kitchen BEFORE

Before we even started the bathroom reno,
we began the process of revamping the kitchen.
But, the kitchen cabinets took a little bit longer
than I thought they would...
so both of the renovations were happening at the same time,
and oh my goodness it has been messy, dusty and chaotic.

But as the renovations have progressed,
I have became more motivated 
and I feel like I have gone into some sort of 
"nesting" mode.

Anyway, here is the BEFORE of the kitchen:
3 different wall coverings in one space...

our $85 craigslist oven!

North side of Kitchen

Doorway to dining room and doorway to hallway (Blue paint)

2 different types of floor trim on top of each other

That is a little piece of psychedelic carpet that must have been left
when the previous owner updated the flooring...


South side of kitchen


East side of kitchen


yellow cast iron sink


View from dining room

view from hallway


The cabinet hardware was rusty and had sharp edges

The drawers had the same hardware as the cabinets

The cabinets were hung in the 1970's 

some sort of china closet with glass sliding doors and scalloped wood edges

Let us not forget the yellow double oven that we used to have...may she rest in peace!

I cannot.wait.for.this.room.to.be.DONE!